ShortLink v1.0 Documentation & Setup Guide
Welcome to the official documentation for ShortLink v1.0. This comprehensive guide covers everything you need to know to successfully install, configure, and operate your URL shortening and analytics platform. Whether you are launching a public SaaS application or managing private marketing campaigns, this manual will ensure a smooth setup process.
1. Server Requirements
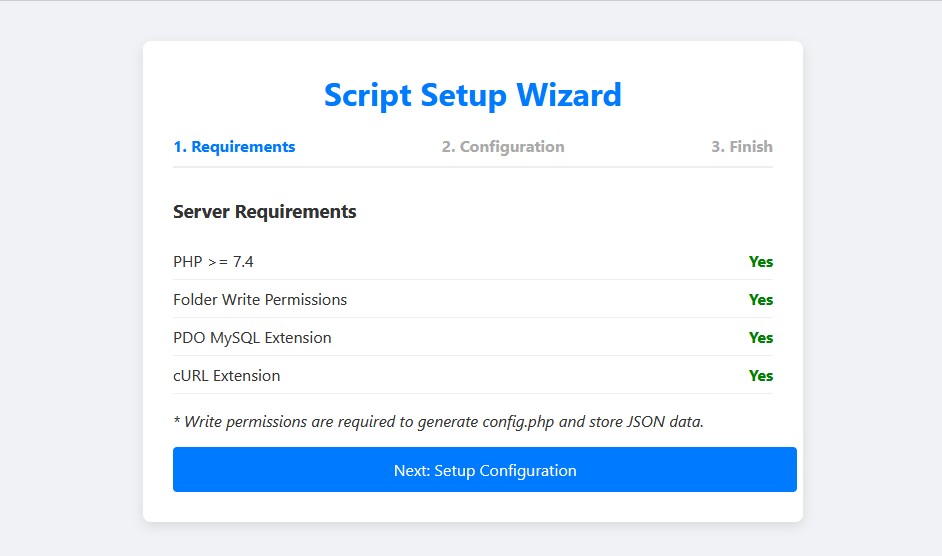
Before beginning the installation, ensure your web hosting environment meets the following minimum requirements. The script includes a built-in requirements checker that will verify these for you automatically.
- PHP Version: 7.4 or higher (PHP 8.x recommended)
- Web Server: Apache or Nginx
- URL Rewrite:
mod_rewriteenabled (for clean, short URLs) - Extensions: cURL enabled (required for Geolocation tracking) and PDO MySQL (if using a database)
2. Installation & Configuration
ShortLink v1.0 features a 1-click installation wizard, meaning you do not need to edit code manually to launch the platform. Follow these steps:
- Unzip the downloaded package to your local computer.
- Upload the contents of the
Scriptfolder to your web server (e.g., via cPanel File Manager or FTP). You can install it on a primary domain, a subdomain, or a subfolder. - Navigate to your website URL in your browser (e.g.,
https://yourdomain.com). The system will automatically redirect you to the Setup Wizard.
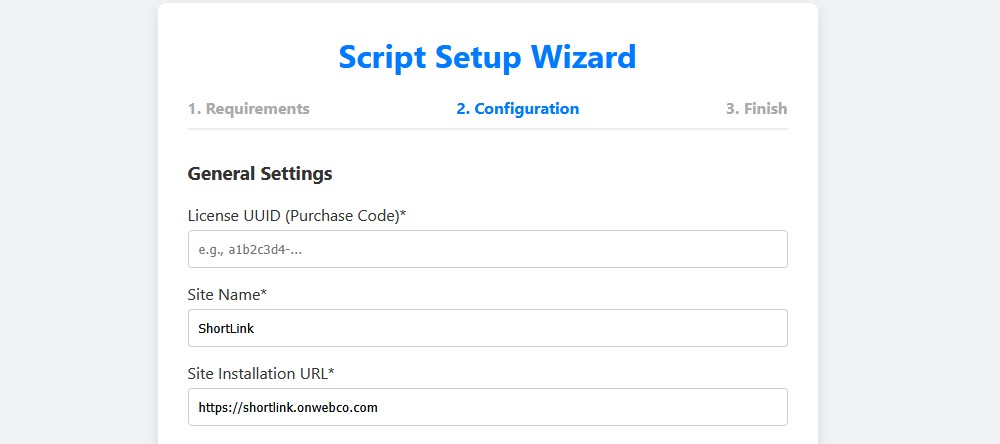
During the configuration step, you will be asked to define your Site Name and set up your preferred database architecture:
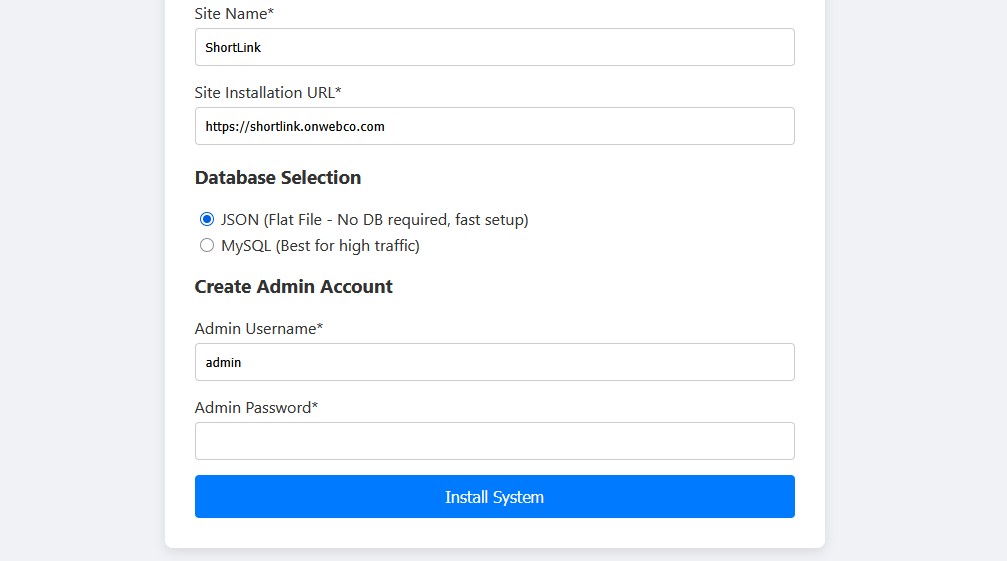
- JSON (Flat File): Requires no database creation. It is blazing fast and perfect for quick setups or smaller projects.
- MySQL: Best for high-traffic environments. You will need to provide your Database Name, Username, and Password.
If the installer fails to write the config file, generate the database, or upload your logo, ensure that your server's
/uploads and /data folders have their permissions set to
755 or 775.
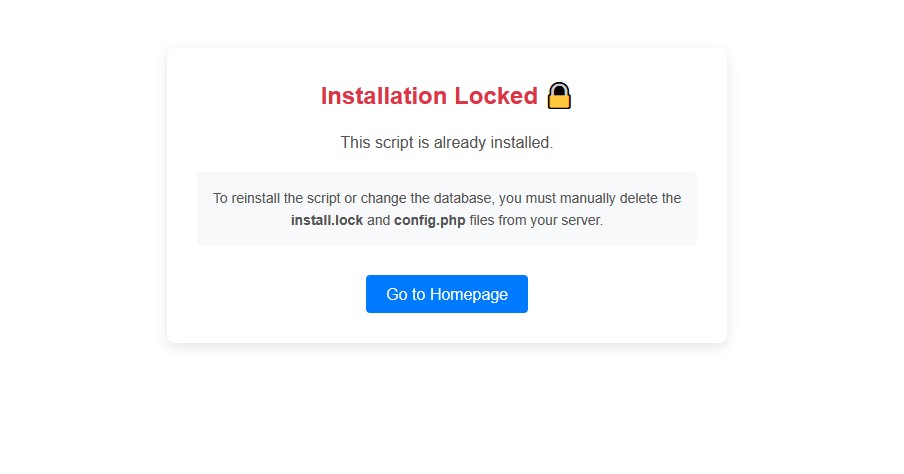
Once installation is complete, the script automatically locks the installer to prevent malicious users from overriding your site. If you ever need to reinstall the script, you will see the security screen below:
3. Using the URL Shortener
The front-end interface is designed to be highly intuitive. Users simply paste a long URL into the primary input field and click "Shorten".
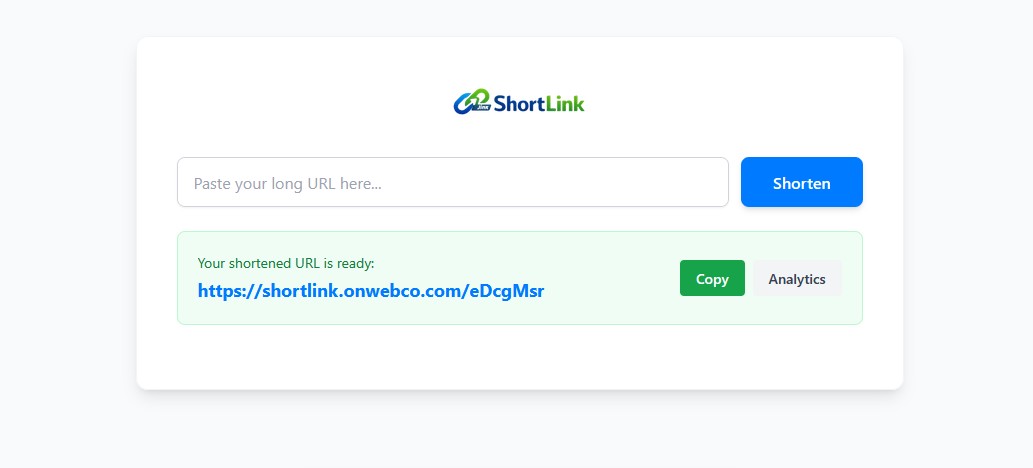
Once generated, the user is provided with a clean, branded short link. They can instantly copy the link to their clipboard or click the "Analytics" button to view real-time public stats for that specific URL.
4. Admin Dashboard & Link Management
As the site owner, you have full control over the links generated on your platform. You can access your
administrative dashboard by navigating to /admin.php and logging in with the credentials you
created during Step 2 of the setup wizard.
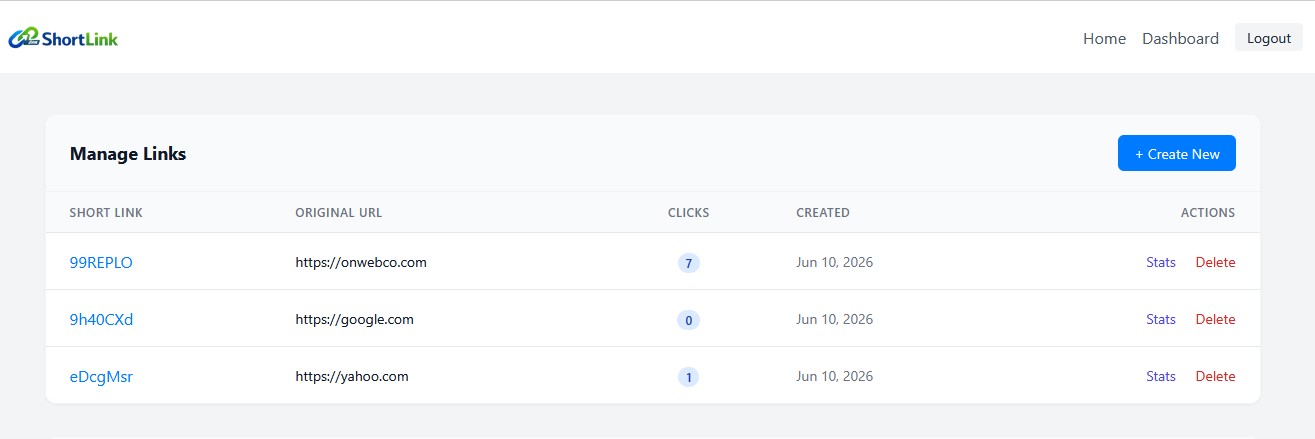
From this view, you can see the original destination URLs, total click counts, and creation dates. The Delete action permanently removes the short code and all associated analytics data from your server.
5. Real-Time Analytics Dashboard
ShortLink provides enterprise-grade data tracking without slowing down link redirection. By appending
/stats to any short link (or accessing it via the Admin panel), you can view a comprehensive
breakdown of link performance.
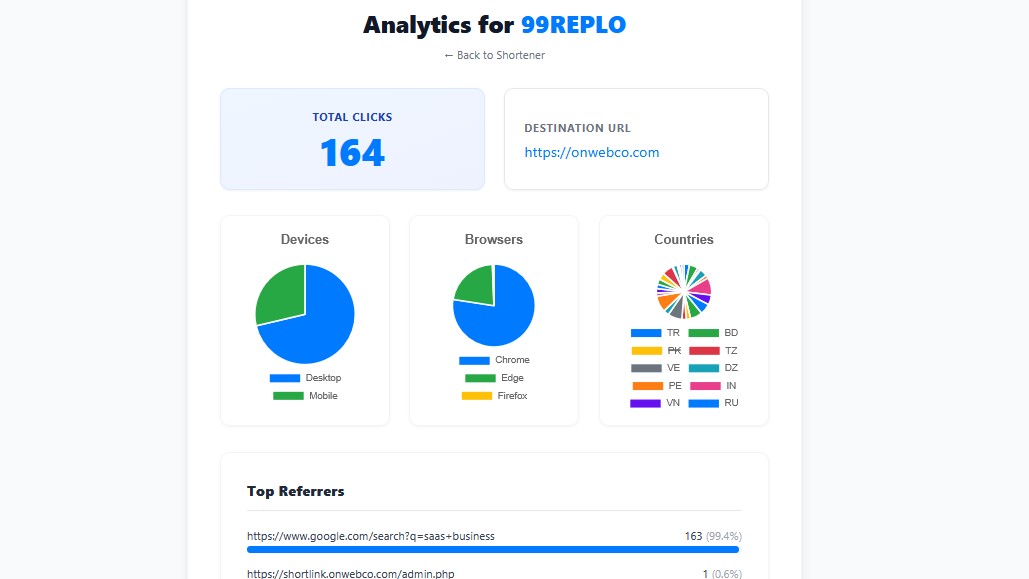
The analytics engine captures and processes:
- Total Clicks: Overall engagement metrics.
- Device & Browser Data: Visual pie charts separating mobile vs. desktop users, alongside browser preferences (Chrome, Firefox, Safari, Edge).
- Geographic Origins: Country-level tracking utilizing IP geolocation mapping.
- Top Referrers: Identifies exactly which websites or platforms (e.g., Google, Facebook, Twitter) are driving traffic to the link.
6. White Label & SEO Customization
You can easily rebrand the platform to match your business identity directly from the Admin Panel, without touching any PHP code.
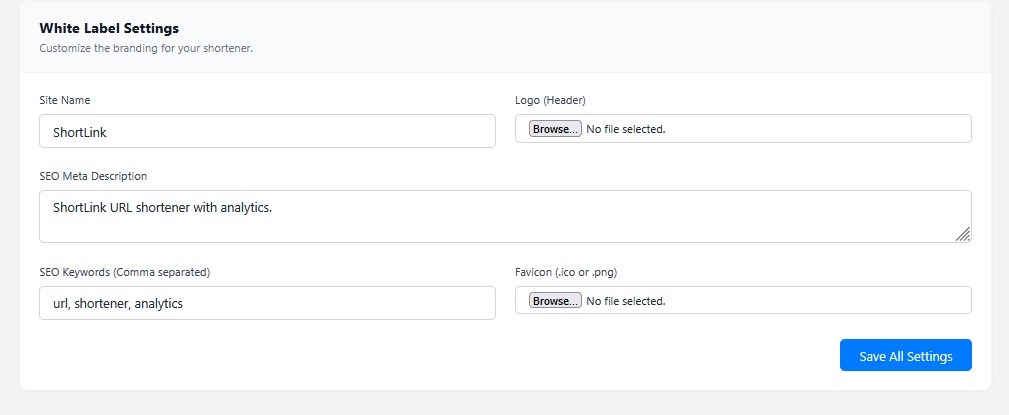
In the White Label Settings section, you can update:
- Site Name: Updates the main text logo (if no image is provided) and the browser tab titles.
- Brand Assets: Upload a custom Header Logo and a Favicon (
.icoor.png). - SEO Metadata: Define your Meta Description and Keywords to improve your ranking on Google and other search engines.
7. Updating Legal Pages
To ensure GDPR compliance and protect your service, ShortLink includes dynamic routing for Terms of Service, Privacy Policies, and Contact pages.
- Open the
page.phpfile in any text or code editor. - Locate the placeholder text blocks (clearly marked with "Note to Script Buyer").
- Replace the placeholder text with your actual legal content and save the file. The changes will immediately reflect on the live site.
8. Troubleshooting & FAQ
Issue: Links return a 404 Error, or the styling/CSS looks broken.
Fix: This indicates that your web server is not processing URL rewrites correctly. Ensure
that the .htaccess file was uploaded to your server (hidden files starting with a dot are
sometimes missed by FTP clients). If you installed the script in a subfolder instead of the root domain,
open the .htaccess file and update the RewriteBase / path to match your specific
folder name.
© 2026 OnWebCo. Need advanced customization or further assistance? Contact us via our marketplace profile.